Get 15% off
your first order
use code DEVA9124
Baby Items
shop for all your baby needs: body pillows, good start formula, swaddle pod. check out baby registry
Buy Baby Items at Diapers.comBuy Baby Items at Diapers.com
Not valid for existing Diapers.com or Soap.com customers. Some resctrictions apply.

Sunday, October 24, 2010

MY BABY BOY'S NURSERY

My little boy's nursery is something I had GIANT ideas for; I started on it, but this whole military life hasn't allowed me to quite get it all done. The uncertainty of moving in a few months, after only being here 4 months, has kept me from making my home pretty and taking the time to put the final touches on the baby's room. To me, my baby's nursery was right up there with dreaming of my wedding day...well, I had to cancel my wedding, (3 years later my dress is still hanging in the closet untouched) and ended up having a local judge marry us in Biloxi, MS under a 100 year old tree (SANS DRESS). Now, I have to hold of on my nursery too. (yes, I am pouting and stomping my feet) Nonetheless, I am hopeful. It appears that fate is inclining us to take a new direction, and we are listening to her...then we may very well stay in one place for longer than 2 years, and I will get to have my own place. Within my limitations, I have managed to do a few things for the nursery though...I painted that little bird over the lamp (RANDOM THOUGHT:  I am thinking of painting kids' pictures and selling them on etsy) I wanted to do a cute, colorful, animal-filled room that doesn't feel overwhelming or crowded. 

here are a few pictures of the things I have done with the nursery: 

 My little thrift store monkey hanging from the lamp
 I got these adorable farm animal bookends from a consignment sale
 These gorgeous little gators are from a thrift store
Cocalo Alphabet Soup bedding
These little wooden cutout animals are from walmart, they were .49cents each. I stuck them to the ends of the finials
Ikea Mobile
I got the rocking chair on Craigslist for $20...I love CL!
Dollar tree frames with dollar tree animals




Wednesday, October 20, 2010

HOMEMADE BABY FOOD

Making my own baby food is something I really enjoy, particularly watching his little face get all excited while eating it. I try and make 2 different meals at once (while I am making dinner, so i kill 2 birds with 1 stone), and enough to make 8 or 10 meals. Yesterday I got a little creative and made my own version of Pasta Primavera and a Fall Veggie Soup. Both YUMMY! I try and buy as many of the ingredients organic, after reading this article 16 fruits and veggies you should buy organic.  My son is six months old, but we started him on solids around 4 months, he sits up all by himself, crawls, and stands up while holding onto things.  (not bragging, just to clarify why I give him such advanced foods)  In addition to that, I am one of those people that feels that introducing a baby to flavorful foods, spices, and a diverse menu will ensure an appreciation for things outside of the French-fry and mac and cheese pool. well, at least I am hopeful. 

Here are the recipes and a few pictures:

Pasta Primavera
1 cup of whole grain pasta (i use rotini)
1-2 peeled roma tomatoes (peeled and seeded)
1/4 cup red bell pepper (diced)
1 spoonful of chopped red onion
a few sprigs of cilantro or parsley
1 clove of garlic-mashed
a little drizzle of olive oil (i know, people say no oil, but its healthy and flavorful)
pinch of oregano
and about 1 cup of yellow and green zhuchinni ( peeled and sliced)

bring 1 qt of water to a boil, then add everything. cook until its all soft (not too long since overcooking depletes nutrients)... then blend gradually until you reach the consistency your baby likes (I use my electric kidco baby food mill). I freeze it in  kidco baby food freezer trays (they are great because they have a lid, otherwise you can use regular trays and wrap in a freezer bag), once they are frozen I remove the cubes from the trays, and place them in labeled freezer bags until i need it. To thaw it, I heat up a glass pot, then add the food in. mix, turn it off and it thaws perfectly.

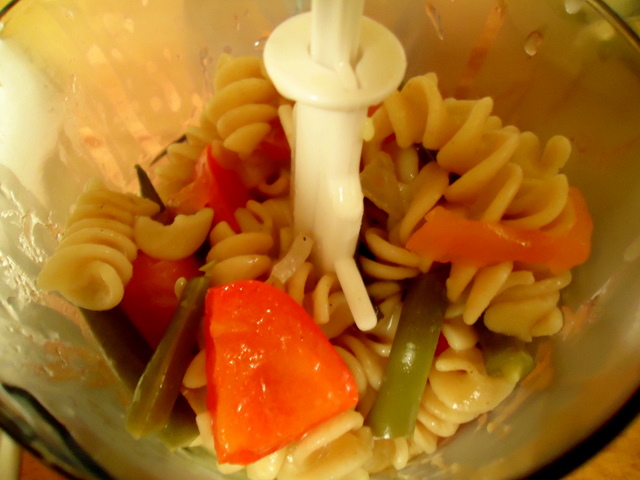
 Cooked pasta in the food mill
 Pureed pasta in trays
 frozen and ready for bagging


Fall Veggie Soup
1/2 of a large sweet potato-peeled and cubed
1/2 a large Idaho potato-peeled and cubed
1/4 cup green beans
2 large carrots, peeled and sliced
1 cup cubed butternut squash
1 yellow and 1 green zucchini (peeled and sliced)
2 stalks of organic celery-sliced
some parsley
some white onion
*you can add a little spinach if you have (i forgot to add it) 
a handful of thin soup noodles

add all of the ingredients to 1 qt of boiling water, cook until all is tender. Then blend. (you can adjust the liquid as you see fit to reach your desired consistency) This yields about 5 cups, I prep for freezing in the trays, and pack like I did the pasta. ENJOY! 
Thin soup noodles
all in the pot
In the blender, ready to go
Poured and set to freeze.  Have fun!

Enhanced by Zemanta

Tuesday, October 19, 2010

ONESIE EXTENDER TUTORIAL

Hi Everyone! 

If your kid is outgrowing his onesies way faster than you can make money to buy new ones? or, if the baby is too long and the onesie too short, but if you size up they swim in the thing? Then, this tutorial is for you. 

I put together a onesie extender tutorial after realizing that I am indeed NOT made of money. FYI, this is definitely not all fancy and cute, since it is going on my son's butt I figured it just needed to be easy and functional. :O)   Let me know if there is something you don't understand or need help with. Good luck! link back to me if you make some.  Took about 4-5 minutes from beginning to end to make 2, total costs: .50cents ( i got 2 carters onesies for .25cents each at my local thrift store..you may be thinking, "why make an extender if you can find them so cheap?" Because they hardly ever have the right size. 

Materials: 

 First, I cut out the area were the snappies are (about 3" high), crop it a little so its straight
 
 second, i attached one to the other with pins.. make sure that they are facing the right direction (look at the picture)

 Thirdly, i sewed about 1/4" in from the edge... i sewed it twice to reinforce it. 

 VOILA!


THAT'S IT! Here is my little man using his. (check out those cute thighs!)